Sunday, April 27, 2014

Tea Room Opening May 1st

To view the latest from Ridge Berry Farm visit our new blog and site!

Well we're finally at the point of re-opening the Tea Room and Market for the Season.

At this point, we really have to thank Mayor Dave and his staff for helping us meet our deadlines. The final results, designed by our local contractor (Tucker Construction) look simply superb.

The new Tea Room
The installation of patio windows allow us to provide some protection from wind, rain and insects, while opening up fully to give that great experience of dining outside.

For the month of May we will be open Wednesday to Sunday from 11AM to 7PM. This schedule will be extended to 7 days a week in the Summer months.

We still have a lot of work to do in the coming week, but we're prepared. Chef has worked out our Spring menu:


Table d`Hote High Tea   ...  includes a Selection of  Tea,
Assorted tea sandwiches  (Watercress on brioche with cream cheese, Curried chicken salad on dark Austrian bread, Egg salad on sourdough bread, Prosciutto and Five Brothers cheese with ice wine mustard on white bread); Hard boiled St. Ann's quail egg; Cream raisin scone with preserves and whipped cream; Mignardises and sweets (truffles, seasonal fruit tart, jellies and cookies)

Impromptu seasonal soup 

Green Salad from Herbs by Daniel and the farm with ice wine mustard vinaigrette

Mennonite summer sausage sandwich, lettuce, on sourdough, with soup or salad 

Warm salad of braised mushrooms, little salad from Herbs by Daniel and a soft poached egg and brioche croutons  

Open faced egg salad sandwich on sourdough with Niagara prosciutto, served with soup or green salad with ice wine mustard vinaigrette  

House made and Ontario charcuterie plate, sourdough, ice wine mustard and pickles

Sweet Plate  (a selection of our Mignardises)

Cream and raisin scones, preserve and whipped cream

Of course we will also have daily seasonal specials and deserts based on what is available from the farm and local producers.

As we begin the new Season, we're also proud to have been certified by FeastON, a new program sponsored by the Ontario Culinary Tourism Alliance. FeastON promotes establishments dedicated to using local foods (our basic operating principle).

The Tea Room is now certified by FeastON for 2014

On another front, it was time to finish our Birch syrup. This process is identical to that of Maple syrup. However, since the syrup is so dark, we decided to double filter before the finishing stage.

Double filtering the Birch syrup
The critical thing about Birch syrup is its rapid tendency to burn. As such, a very watchful eye is needed as the syrup approaches 104 degrees C.

Finishing the very dark Birch syrup
The final product this year has a strong taste of prunes with a molasses finish, perfect for meats and barbecue sauces. 


Birch syrup, bottled and just about ready for sale
Just like our Maple syrup, the Birch syrup will be offered for sale at the Market.

We will leave you this week with a picture of our first Strawberries. Yes they're already coming out...in the Growing Dome that is.


Our first Growing Dome Strawberries


Sunday, April 20, 2014

Finishing Maple and Black Walnut Syrup

To view the latest from Ridge Berry Farm visit our new blog and site!

First we'd like to wish everyone a Happy Easter. Although we had a surprising snow fall this week, it is really beginning to feel like Spring.

This week we decided to stop the tapping of our Maple trees and start finishing our syrup. Technically we probably could have collected sap a bit longer, but we were also keen to start on our Birch trees as well.

Our objective this year was to increase our Maple syrup production and we certainly managed this by tapping a few more trees. Our process was changed however since we did this as a single batch. We acquired a large 60 litre pot to which we continuously added sap as it was evaporated. The entire thing was heated by a propane burner.

Our batch processing set-up for Maple syrup
As we continuously added sap each and every day of our collection, it slowly took on a dark amber shade. Once the container was half evaporated on the last day of collection, it was time to finish the syrup indoor.

We had filtered every batch of sap, but before finishing the syrup we filtered it again to prevent the occurrence of Maple sand (the crystallization of natural  minerals like calcium and magnesium).

Second filtration of the Maple sap
One of the obvious findings this year is that the syrup would turn dark. We also noticed that the sap had a very high sugar content (just handling it off the trees made our fingers sticky). We also noticed that some of our trees generated a yellowish sap which was the sweetest of all (we had to try it). Perhaps the trees this year stored much sugar than last year, as a result of the bitterly cold Winter.

Differences in sap colour seemed to also indicate differences in sugar content
Back in our professional kitchen, we loaded our sap after final filtration and started another boil. We used a candy thermometer to monitor the progress in syrup production.

The kitchen set-up for syrup finishing
The point at which the syrup is done is when the boil is sustainable at 4 degrees C above the boiling point of water (104 degrees C at sea level...which proves good enough for us in the Niagara Peninsula). For those at significant altitude, all you need to do is first boil water to determine its boiling temperature and then add 4 degrees to this.

One of the things we did notice is that you can almost tell things are done by sight. When the sap boils at 100 degrees C, the movement is rapid and turbulent. When the syrup stage is reached, a massive amount of small bubbles are created on the surface.

Boiling at 100 degrees C
Boiling at the syrup stage
After quickly getting the syrup off the stove, it was time to bottle. We're really pleased with the finished results and will be selling these at the market.

Ridge Berry Farm Maple syrup: "cuvee" 2014
With the Maple syrup done it was also time to conclude our Black Walnut syrup experiment. Having tapped a couple of trees, we really wanted to see if this syrup is also worth producing.

The process is identical to making Maple syrup, however it should be noted that Black Walnut syrup consists of both fructose and sucrose (Maple is primarily sucrose). Our Birch syrup experiment last year proved that fructose was much more sensitive to heavy boiling in the finishing stage (and as such easy to burn).

We noticed that the Black Walnut was also sensitive but perhaps not as much as Birch.

So what did we end up with....3 little jugs of a fine syrup which was surprisingly good with some floral and nutty tones (not the heavy Black Walnut taste we were expecting).

Our Black Walnut syrup
The ratios of sap to syrup turned out to be similar to Birch (roughly 80 to 1). As such, Black Walnut syrup is an expensive product to make. Things are a bit worse than Birch since it seems that Black Walnuts do not produce as much sap (although we still need to look into the timing for tapping these trees).

In the end, this was an experiment worth completing and next year we expect to have Black Walnut syrup on our market shelves.

With this work complete, we could now look forward to Birch syrup production. Last year was an experiment, this year we aim to produce enough to sell.

Tapping Birch
On a final note this week, someone decided to drop off some apples and some great apple cider at the side of the barn....Thank You!

The latest "freebie" dropped off at the barn
Over the past year we have really benefited from the kindness of friends and neighbours. We have received everything from Apples, Quinces, Peaches, Grapes, Nuts, etc.  even help with snow removal.

This has given us an idea. We will not discuss it now, but you can expect an interesting announcement in June, when our first berries are picked.

We will conclude this blog entry with a quick photo taken this week. Hopefully this will be the last snow we see in a long while.

Pelham in mid-April???


Sunday, April 13, 2014

Water Management in the Growing Dome & Planting Haskaps

To view the latest from Ridge Berry Farm visit our new blog and site!

Now that we are finally enjoying some great Spring weather, we actually ended up spending most of our time "inside"...inside the Growing Dome that is. We had two motivations for getting more active in this "off the grid" greenhouse: 1. our water pipe to the well finally thawed out, and 2. the mainly sunny days allowed us to test our new solar-powered hydroponic configuration.

Water is finally flowing from the well to the main water tank in the dome.
Since our early experiments last year, we have been working on a new configuration with our hydroponic tables. The main design constraint is that everything should work based on a single solar-powered water pump. Since we now have 4 sets (of 2) hydroponic beds to feed water to, the key issue has been the distribution of water to these beds. We decided to use one of our spare hydroponic beds as a "holding" tank.

The prefabricated hydroponic beds are rectangular with beveled corners. This meant that we could install outlets at the four corners of a tank to feed our growing beds.

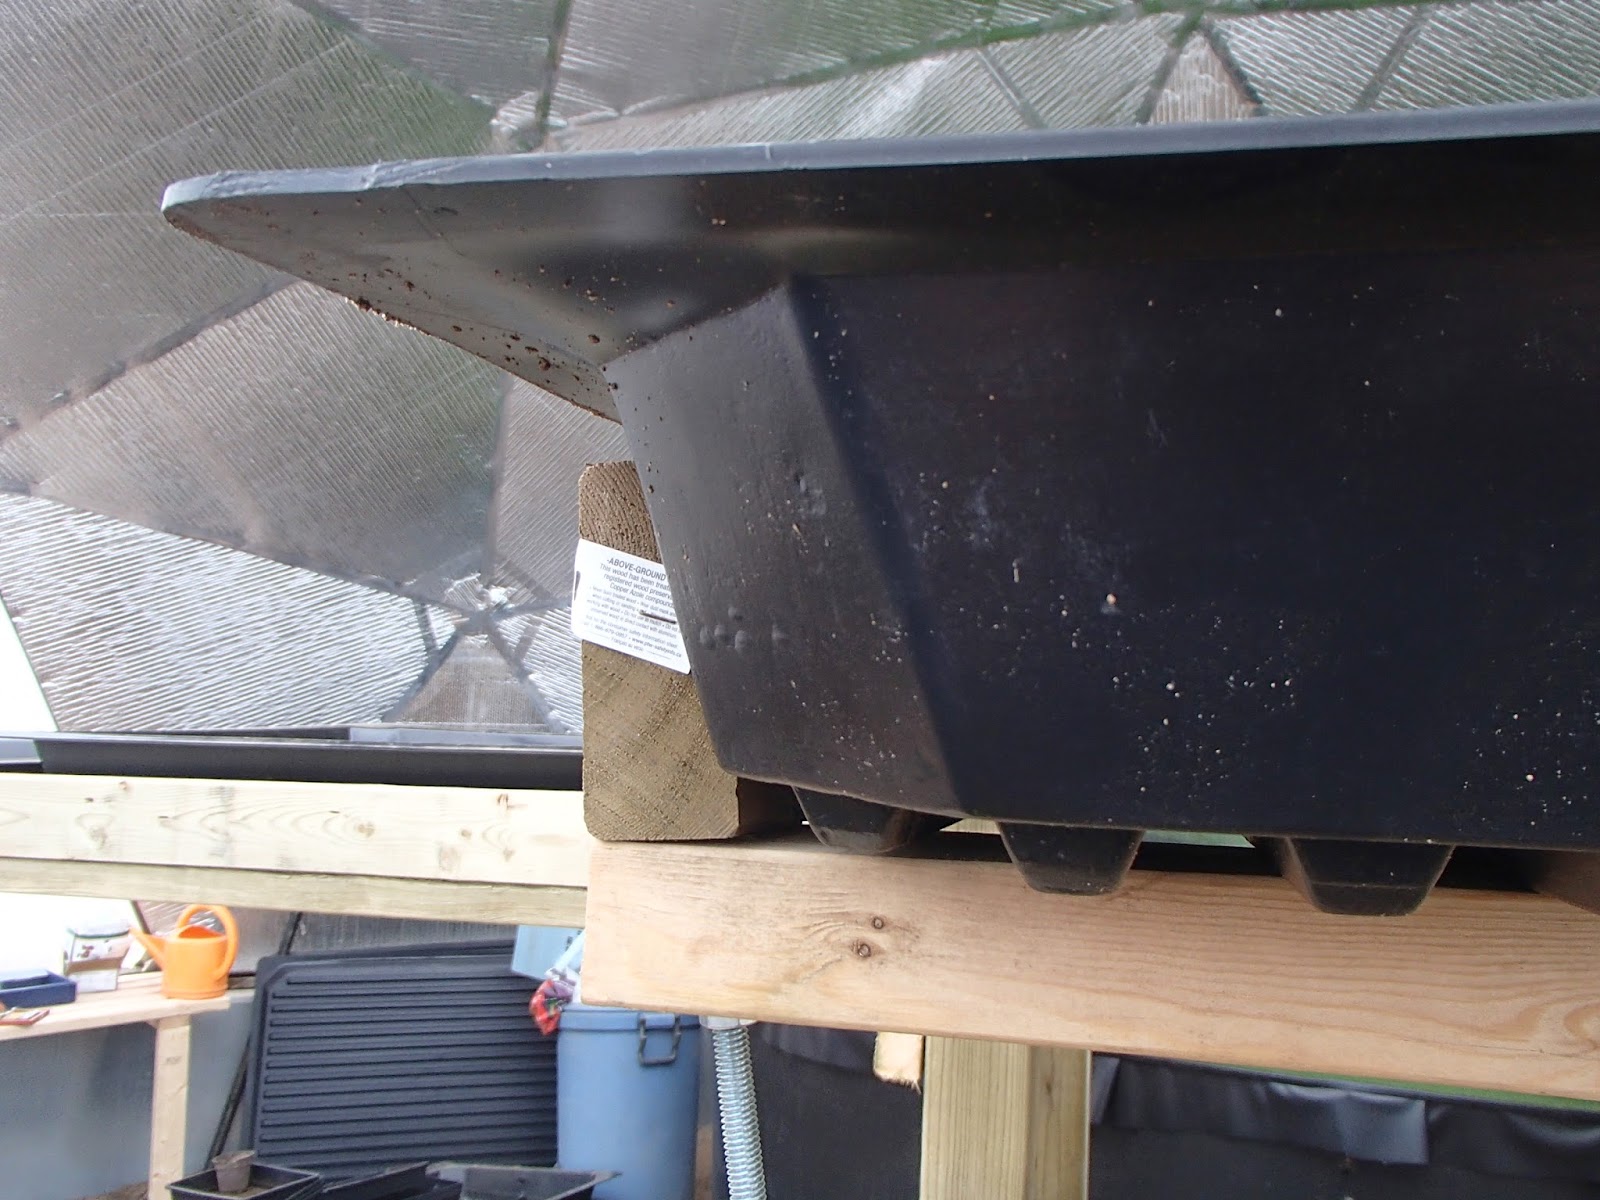
The beveled corner of a prefabricated hydroponic tank
The key to the installation would be to achieve a steady flow of water to the four branches of our installation. As such, the leveling of the holding tank and the position of the water feeds would be an issue. We therefore decided to mount the holding tank on a frame with 2 threaded rods which would allow for the adjustment of the tank's tilt.

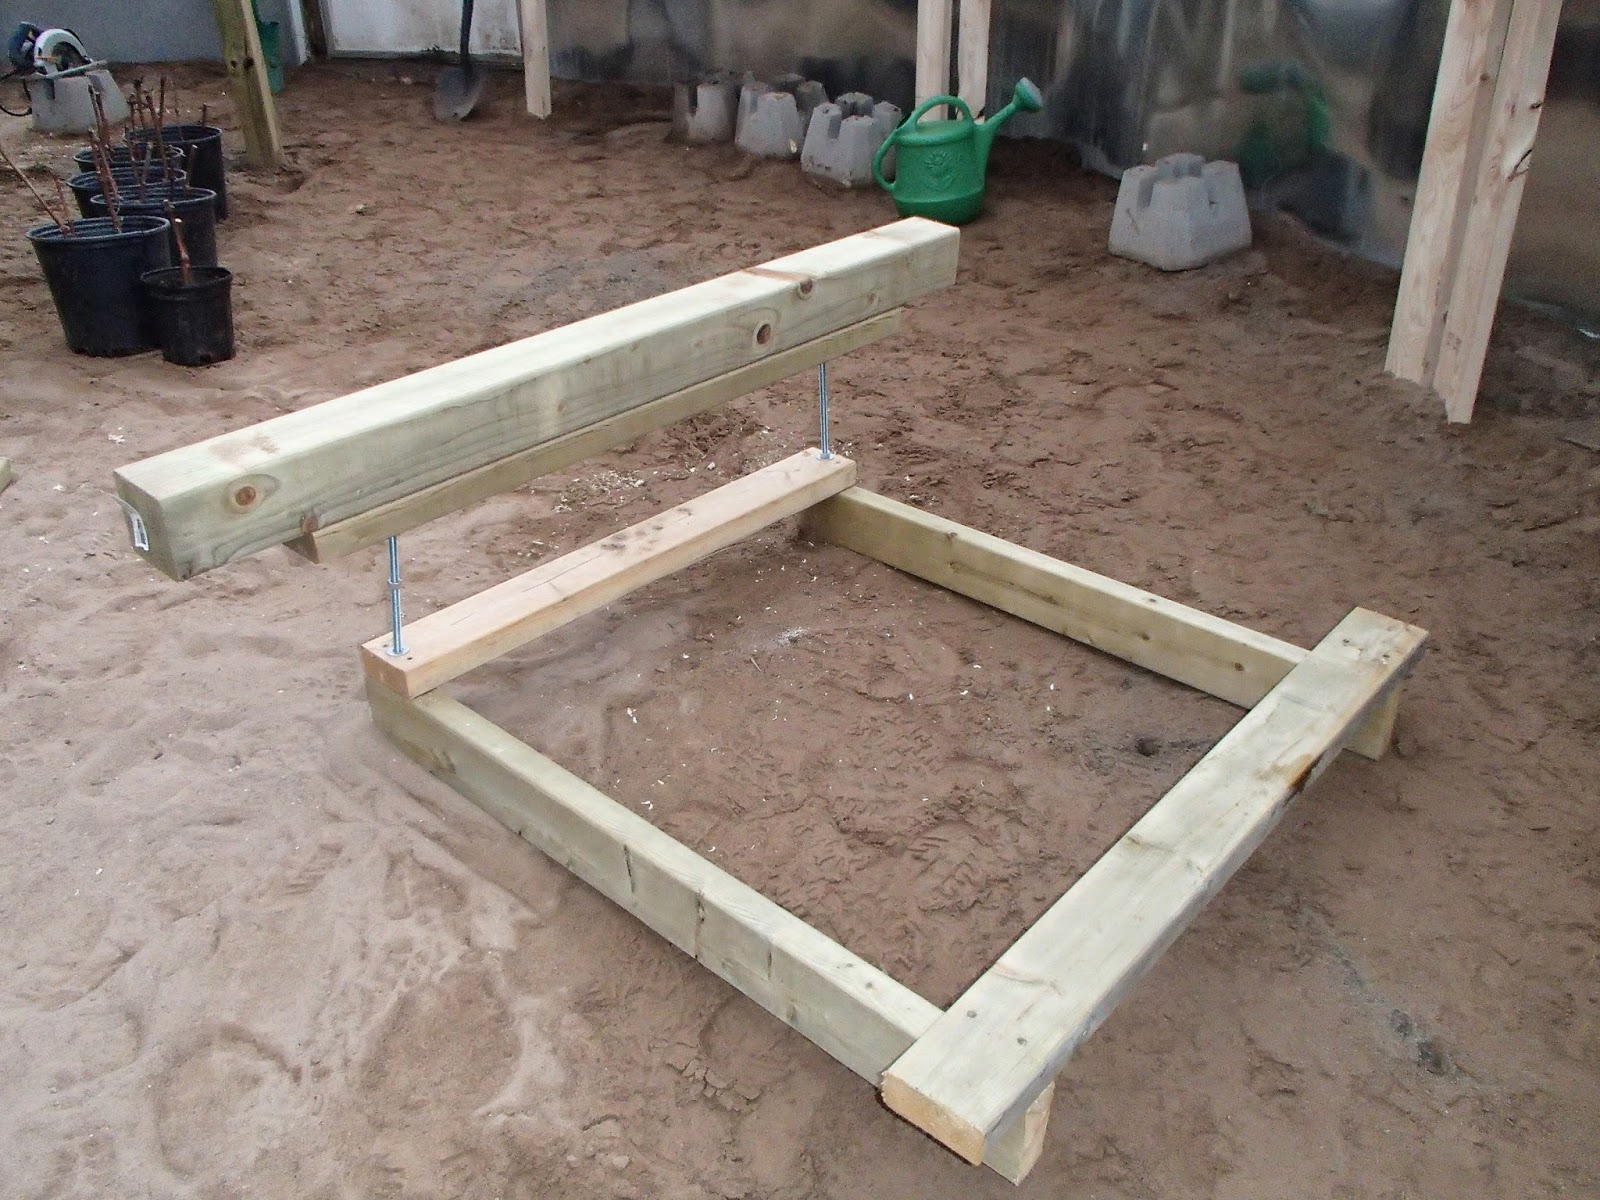
The holding tank support frame (upside down).
It was then time to address the "spouts" or fittings we would use to transfer the water from the holding tank to the hydroponic tables and from the hydroponic tables back to the main tank.

Last year our experiments proved that the standard grommet and tube fittings were not only difficult to water proof but also proved much too small to handle the flow rates from our solar powered bilge pump.

We decided to use and electrical fitting normally used to guide cables across barriers where water may be an issue. these are fitted with an O-ring which we doubled in order to have a good water seal on both sides of the tank walls.

The new fittings used to tansfer water from one tank to another.
One additional feature of these fittings is that they fit snugly in tubing with a 5/8 inch inner diameter (standard garden hose dimensions).

The holding tank was equipped with 4 of these fittings as well as each tank in the 4 branches of the assembly.

Water  flow fitting on the holding tank 
Water flow fitting between hydroponic tanks
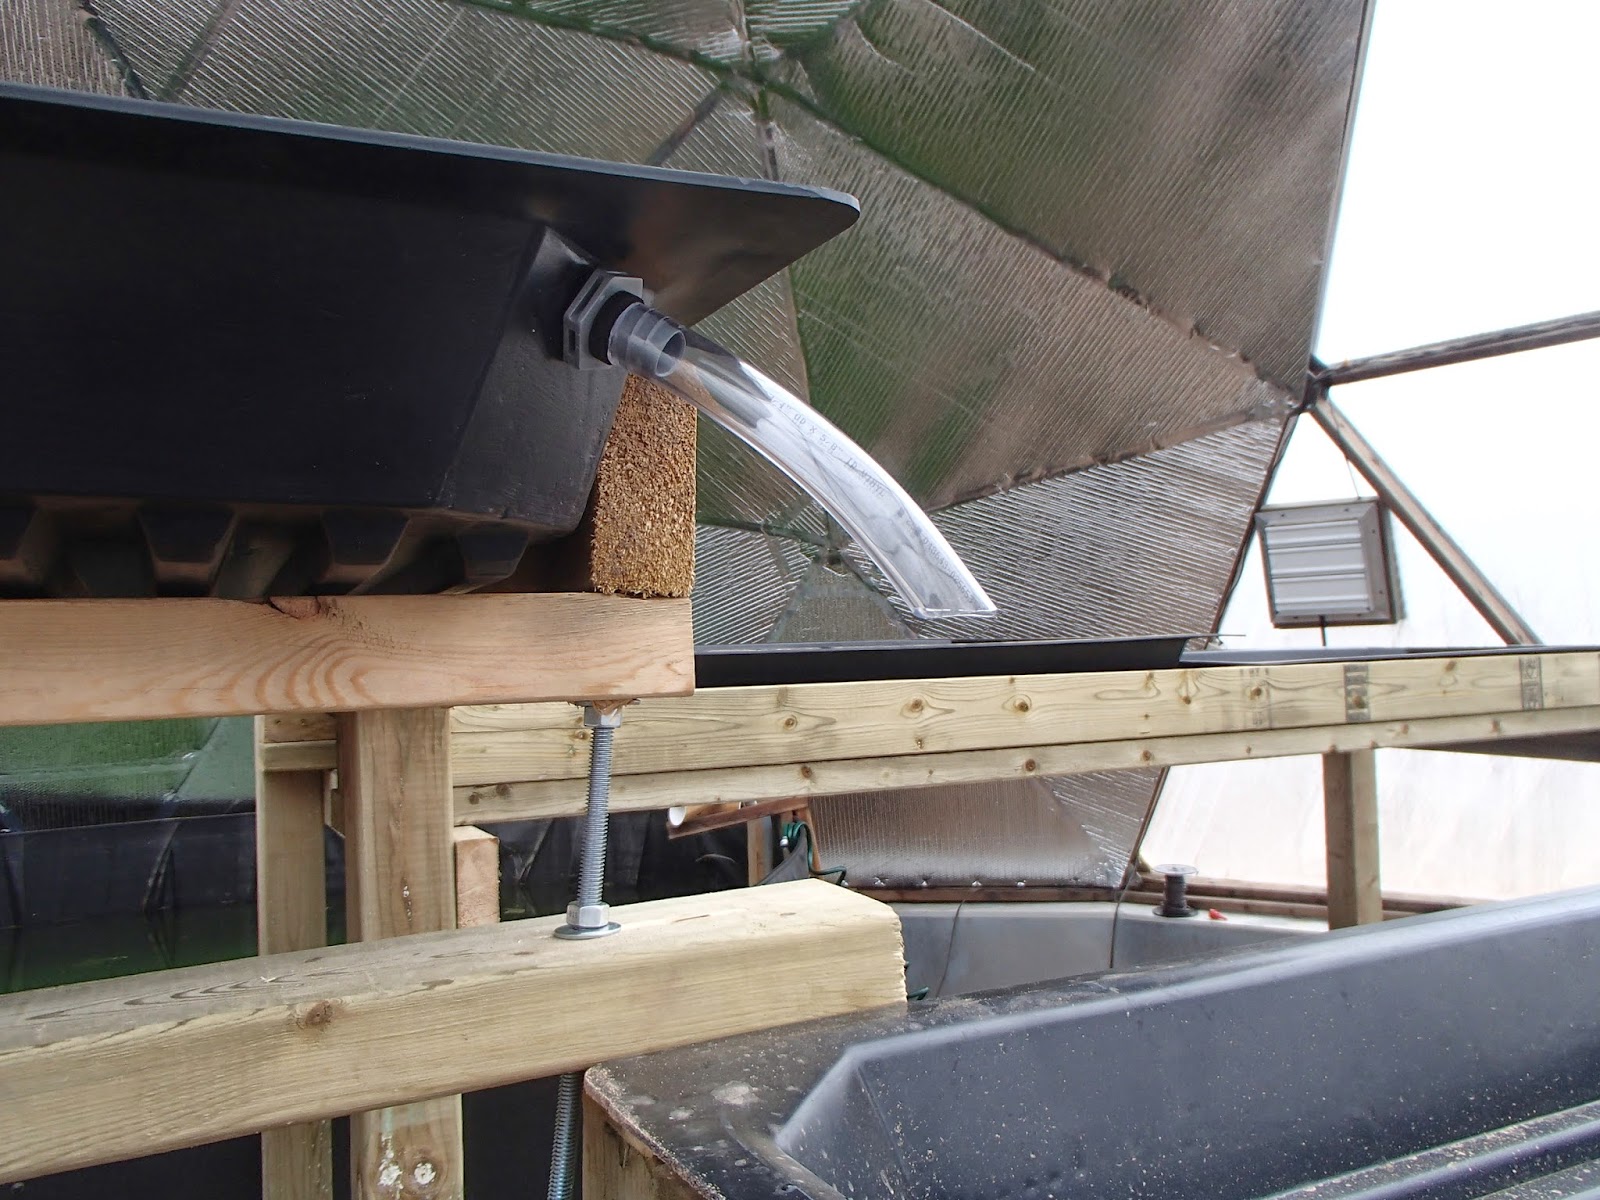
Since our design constraint means that water must return to the main tank via gravity, the last hydroponic bed in each of the 4 branches was fitted with a simple garden hose leading back to that tank.

Garden hose leading back to the main tank.
Experiencing a few good days of sunshine, we were able to test the entire system at what would be a maximum flow rate from the bilge pump.

The first results did create a bit of panic. The fittings held up, but after balancing and leveling everything we could, we came to the realization that the flow rates were just too much even once the flow of water was divided into 4. The net effect was an overflow of the hydroponic tables.

To reduce the flow rate we added an "overflow" mechanism at the holding tank (thereby reducing the amount of water distributed to our hydroponic tables. The water overflow went directly to the main tank.

Holding tank overflow mechanism.
The net result is that we were finally able to reach a steady state of water through the entire installation at what would be a maximum flow rate.

The entire system finally running at steady state.
Of course, things can always go wrong and in our case, once we had everything working....the bilge pump stopped functioning. We're not entirely sure what has happened yet. We simply lost all pressure from the pump and it can longer lift a column of water higher than 6 inches.

In any case, we know we'll be able to overcome this and it's finally time to consider populating the main tank with fish.

With the weather as it was, it was also a great time to work outdoors and this week we received our first root stock ready for planting: Haskaps.

Not many are familiar with the Haskap. Haskap is the Japanese (Ainu) name for the edible Blue Honeysuckle and the word means "berry of good vision and long life". It is native to large regions of the Northern Hemisphere and is found wild in every Canadian Province with the exception of BC.

This berry is actually related to the tomato and the varieties available in Canada were developed by the University of Saskatchewan. Some are descendants of a Russian cultivar brought to Canada in the 90's.

Why would we consider these: the berries are large and oblong (~1 cm in diameter); their taste profile has been compared to Blueberries, Juneberries, Currants, Raspberries (very hard to define); their seeds are not noticeable in the mouth (similar to Kiwis); once frozen, when thawed the skin disintegrates (great for processing); their juice produce a very intense purple red colour and apparently can be used to produce a good wine (similar to Grape or Cherry).

The Haskap

So it was time this week to start planting our Haskap "plugs". We re-tilled our newly defined rows (from last fall) with our trusty BCS.

We'll digress a bit here but we will swear by the performance of the BCS tiller. It has been one of our best equipment purchases over the past year. Anyone looking for a small but highly capable machine should look into this. I will have to add a couple of caveats. Like every piece of performance machinery from Italy (eg. the Ferrari car) it has its issues: first the human-machine interfaces could use some serous re-thinking; second it is not cheap. But the performance is simply superb!

Preparing our Haskap rows with the BCS tiller
Planting the Haskap "plugs"
The Haskap requires cross-pollination so we have two varieties in a ratio of 2:1. With a total of 252 plants to get into the ground this is really back breaking work.

Although the weather this coming week does not look great, we'll end this blog entry with a couple of photos that clearly show the onset of Spring.

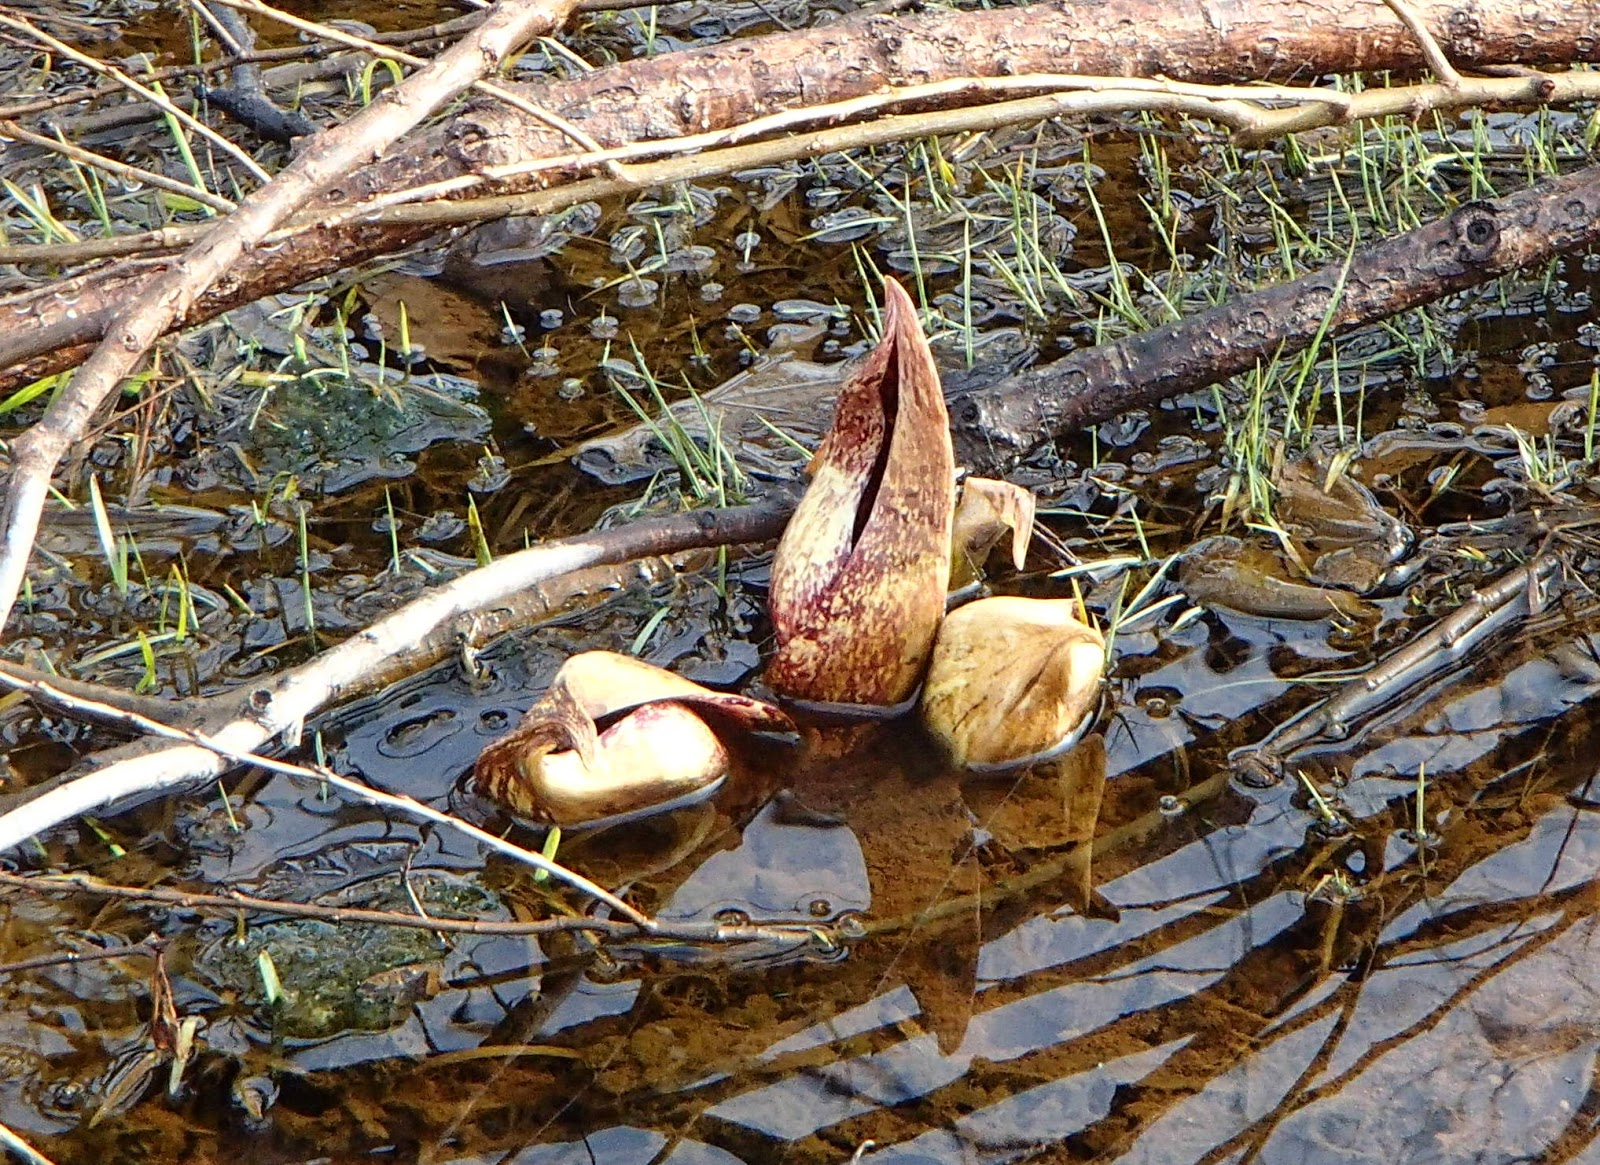
The Skunk Cabbage is appearing in the wetlands.
Small flowers are starting to bloom

Sunday, April 6, 2014

Finishing a Raised Bed

To view the latest from Ridge Berry Farm visit our new blog and site!

The weather is really beginning to feel like Spring and it's finally been a joy to work outside.

This week we managed to finish one of our new raised beds and even had a chance to take on a second. Once the frame is up and the newspaper laid out, it was time to fill our first bed with a combination of top soil with some organic mix. The size of the bed (16 x 6 feet) demanded that we use our tractor's front loader for the task.

Finishing the first raised bed
One of the key issues with the warming weather is the soft soil. With the large amount of melting snow and recent rains, the tractor cannot be easily used everywhere without leaving some major tracks. As such we have to be patient and wait for a morning when the ground is frozen or has had an opportunity to dry.

For the second bed, we decided to line the bottom with cardboard. We have plenty from various packaging and it has less tendency to fly off when the winds are gusting.

Lining the second bed with cardboard
Things are starting to look good....only 10 more beds to go! We'll be taking our time since we're not likely to directly plant or transplant anything until the 3rd or 4th week of May.

The raised beds are slowly coming along
One of the issues we have come across is a result of the Growing Dome construction. When the land was graded for its foundation, we ended up creating a "trough" between a slope and the foundation's hill. The net effect is a great accumulation of water between the two and some nasty spots of "quick sand", so once again we'll be faced with the installation of some drainage pipes.

Something we'll need to address with proper drainage
It's nice to see the beds coming along because some plants are really starting to enjoy the environment created by the Growing Dome. Within a few days we have seen quite a few sprouts and now we are a bit concerned that some of these plants will be rather mature by the time we can transplant them to the raised beds. The fastest growing plant has been our Persian Cress.

Within 2 days in the Growing Dome these Persian Cress seeds have sprouted
The Growing Dome has been quite a surprise for us. Even though the thermal mass (water tank) was not stable, it was surprising that some of our selected "guinea pigs" survived the entire winter. This includes a small Sage (which was set up in one of the hydroponic tanks), a Fennel, and of course our Strawberry which is now in full bloom.

The hardy Winter survivors of the Growing Dome
While our planting is now well under way, it was still time to collect Maple sap for our syrup. The difficulty we've encountered once again is the soft soil in the areas where we have to access the trees. There are quite a few places where we just cannot get the tractor or any other vehicle into the general area. We've come to terms with this by getting the tractor as close as possible. Tristan has worked out a simple sling arrangement to hook up our heavy buckets of sap to the tractor's safety frame making the transportation of these back to the barn at least a bit easier.

Necessity is the mother of invention....slinging the sap buckets to the tractor
Meanwhile we continue to work on our preserves and jams eagerly anticipating our Market and Tea Room opening day. Chef has been keeping busy preparing his stocks and making some of our jams with the berries we froze from our last harvest. This includes a new Kiwi compote blended with white wine.

Chef has been busy working on our preserves
With the restaurant kitchen fully functional, we also took the time to produce our own "Detox juice". Using the steam juicer, we produce a great Blackberry juice (loaded with antioxidants); we then blend this with a local Apple cider (2 parts Apple to 1 part Blackberry) to get a great and healthy refreshment. The Blackberry juice cuts the sweetness of the Apple cider while giving it a wonderful berry taste.

The steam juicer is back in action
 We'll finish this week with one observation concerning the Arctic Kiwis. These plants have a phenomenal ability to grow. Readers will know that it has not been long since we last pruned these vines. With Spring finally here, these vines have already surprised us with some significant growth. It's as if we were sloppy in our pruning. It would really be fascinating to capture the growth of these vines under some time lapse photography (perhaps a future project).

The Kiwis are already sprouting new shoots